Public Construction by Mayor
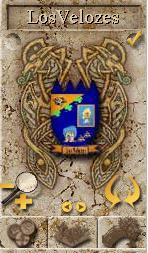
When the mayor wants to construct something in the town he has to activate the building menu by clicking a faint circular button in the upper-right corner of the screen. Sometimes it can be practical to increase the screen size. The treasurer doesn't necessarily have to be present during the construction; he can accept the building proposal at a later time.

After activating the building menu additional tabs will appear. You can navigate between them using the small yellow arrows. With building, a distinction is made between types of ground, objects and buildings. Objects and buildings have no standard ground underneath them so they can be combined with any type of ground as desired.
Tab: Ground (Untergrund)
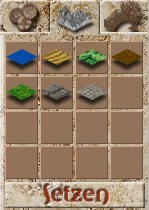
The ground consists of different layers. At this moment 7 out of 16 possibilities are in use. The lowest layer is water, next is desert and untilled lands. After that there is a cornfield layer and different kinds of plains and flowers. The last two layers are the muddy paths and the paved roads.
Transitions between layers are automatically generated by the system. The highest layer determines the way in which this transition is generated. This way, water and plains will e.g. have a smooth transition, while paved roads will have a "hard" and angular transition. So the use of water as lowest layer has no influence on the way the transition is generated.


To edit the ground, first mark a rectangle on the map of the desired size. Then choose one of the layers. Most layers consist of more than one ground. You can view the different types of ground by clicking on a layer, hold the button and drag the mouse to the left and right. When you've picked the desired ground click on "Setzen" to place it. Should the "Setzen" button not be visible, try to incease the size of the screen or scroll down.
After this switch to the tab with the building costs ("Baukosten").
Tab: Building costs (Baukosten)
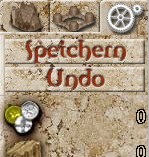
On this tab the costs of the landscaping can be monitored and the construction proposal can be saved ("Speichern"). In case the proposol is too expensive or you simply don't like it, you can cancel all changes by clicking on the "Undo" button.
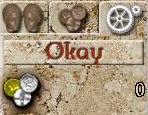
After the mayor has saved a proposal the treasurer has to confirm it by clicking on the "Okay" button on this tab.
Tab: Objects (Objekte)
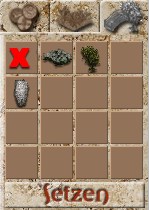
Select this tab to build objects. Objects are grouped on this tab as well. To build them, first mark the desired location in the map. You can place an object on a single square, but also fill a larger rectangle in the same way you can edit the ground.
After marking the desired area click in the building menu the desired object. You can scroll in the grouped objects using click and drag (left and right). The red X is used to remove existing objects in the marked area (the group with the red X also consists of other objects).
Once you've found what you're looking for click on the "Setzen" button to place it.
After this the proposal needs to be saved and confirmed as described above under "Building costs".
Tab: Buildings (Gebäude)
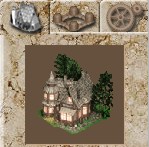
On this tab you can scroll through the different buildings using click and drag (left and right) in the same way as in the ground and objects tabs. Place it on the desired spot on the map by clicking on the map. After that the building proposal will be visible for the mayor and the treasurer (if they've activated the building menu).
The construction of buildings with game rooms in them takes place in phases. The number of phases and the total cost of the building are shown in the construction costs table.
The first phase is built by the treasurer and the mayor together; the mayor chooses the building site and the building, places the building and saves it as described above. After the treasurer has clicked "Okay" the foundation of the building is constructed. The building is now considered a building site and it's location is occupied. The number of building sites in a town is unlimited, though they increase the amount of taxes a town has to pay.
At this stage of the building the site can be demolished without any loss of resources. To do that the mayor has to enter the building site and click on the "Abreissen" button. The treasurer has to confirm this by clicking on the same button within 10 seconds.
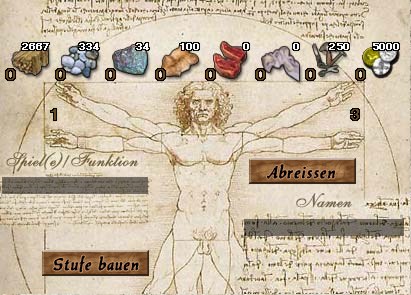
To build a single-story building, the Mayor and Treasurer must enter the construction site. The Mayor types the name of the building in the right-hand gray input field and the name of the game in the left gray field, and completes them with the ENTER key. A message, "Bezeichnung und Spiel gesetzt," (designation and game set) appears in the chat window. At that point the Treasurer can complete the building by clicking "Stufe bauen" (build a floor).
Multi-story buildings can be built (except for the final flor) by the Treasurer alone, who enters the construction site and clicks "Stufe bauen" (build a floor) when the needed resources are available in the city's market and warehouses. The last floor can be built only after the mayor has entered the building's name and game as above.
For the multi-room buildings (castle, fortress, cathedral) all games are entered in the single input field, separated by commas and with no whitespace between.
Example: Venedig,NotreDame,TurnIt
In the picture shown above, the first of three floors of a witch house has been constructed already. The white numbers indicate the necessary resources and talers for an additional floor.
Until the construction of the last floor of a building, the game and name can be changed at any time. Also until that time, the Mayor and Treasurer together can demolish the unfinished building. Resources already spent are lost.
Expanding Storage and Banks: the treasurer can add space to expand storage or banks by using the "Stufe bauen"-Button.
Tab: Plots (Parzellen)
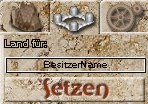
Allocation of land parcels is a duty of the mayor. To do this, he enters the name of the owner-to-be in the input field labeled "BesitzerName" and marks the area of the plot as he would mark an area for landscaping. After the Mayor saves the assignment (with "Speichern"), the Treasurer must confirm it with the "Okay" button. The plot can be of any size, and a citizen may be assigned additional plots, which will receive their own room numbers.
Before beginning, it may be useful to click the faint "Parzellen" button under the left end of the city name to show all allocated parcels.
Assigning plots to citizens with special characters in their nicknames can be problematic. Please contact an Admin in such cases.
Extending the City Limits
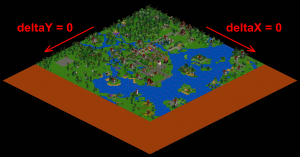
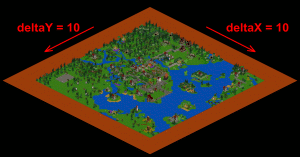
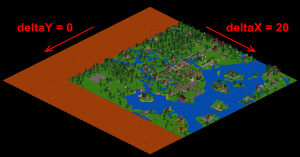
The mayor can extend the area of the city. The command /extendland deltaX deltaY extends the area by 20x20. The treasurer must confirm this action with /extendland yes. The values chosen for deltaX and deltaY move the old city view on the new ground accordingly.
Beispiel: /extendland 0 20
